


Let’s tackle aperture! Aperture is the probably the hardest of the exposure triangle to understand. However once you get the hang of it it’s a breeze 😉
Aperture – the size of the opening in your lens allowing light in. Also determines depth of field in an image.
Back in Step 1 you learned your camera and where each button and dial is. Aperture is usually a dial on your camera. Turning that dial changes your aperture setting, the opening in the lens. The larger the opening, or wider the aperture, the more light you let in with each exposure. The smaller the opening, or narrower the aperture, the less light you let in.
Stop for a second. Take that in.
Read it again.
Understanding that?
Now one might think if a wider aperture lets in more light why would we ever use a narrower aperture. You may end up in a situation where there is too much light, overexposing your images. Narrowing your aperture is one way you limit the amount of light coming in. More than likely you’ll be adjusting your aperture to determine how much of your image you want in focus. The narrower your aperture the more your photograph will appear to be in focus. So a landscape photographer often uses a more narrower aperture. They want that landscape photo to be appear in focus through the whole thing most of the time.
You’ve probably seen photos (even on this blog)where the subject is in focus but the background is blurred. This is achieved by using a wider aperture. This is often a desired look in portraiture.
Aperture is represented in what we call f-stops. A lower number such as f/1.8 signifies a wider aperture (more light, more blur). A larger number such as f/22 signifies a narrower aperture (less light, more focus). The lens you use will be marked, usually close to the glass, the widest aperture possible. For example the Canon 50mm f/1.8 can only open up to a 1.8 it cannot open wider than that to say a 1.4, 1.2 or even a 1.0! It’s limited to 1.8 as the widest. Some will say a range such as f/3.5-5.6 This is common for a zoom lens. When you have it zoomed out as far as it will go the widest aperture available is f/3.5. When you have it zoomed all the way in on your subject the widest aperture available is f/5.6 As you zoom it changes the widest aperture that you can go. There are fixed aperture zoom lenses. They cost more money. The Canon 24-70mm is a f/2.8 You can zoom all the out and then all the way in and still be able to have an aperture of 2.8.
Ok take a second. Breathe. It’s alot right?!
Let’s summarize that a little. A wide aperture, such as f/1.8, lets in more light and has a shallower depth of field (meaning less of your photo will appear in focus). A narrower aperture, such as f/22, lets in less light and has a deeper depth of field (meaning more or your photo will appear in focus).
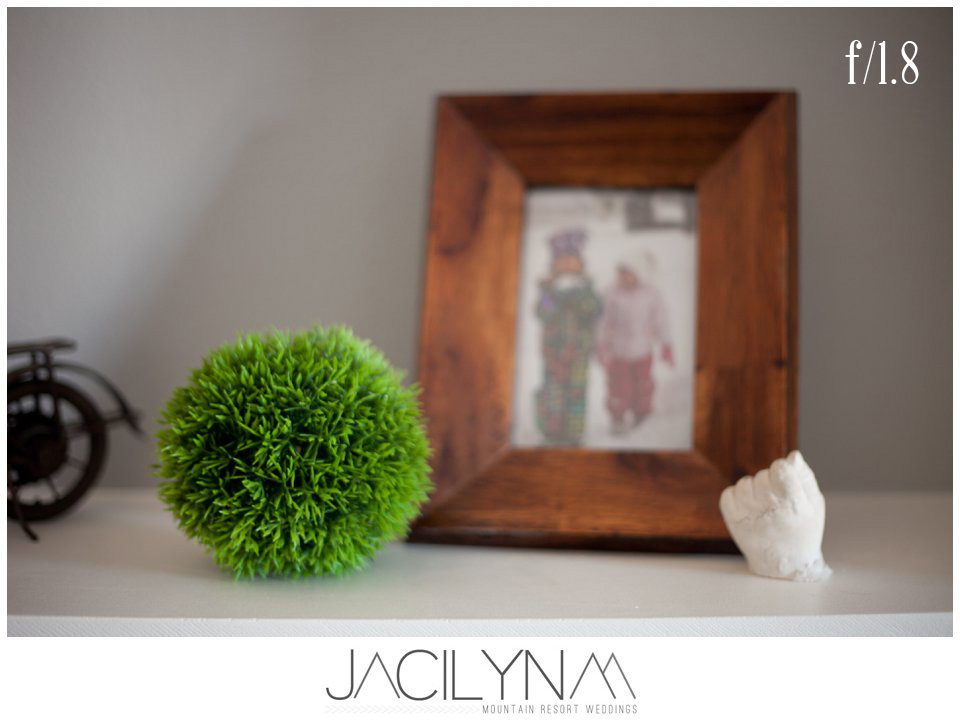
Let me show you an image in different apertures so you can visualize it. I used the Canon 50mm f/1.8 lens. Couple of reasons it’s an inexpensive lens. As you’re starting out you probably don’t have thousands of $$$ to drop on a lens. The Canon 50mm f/1.8 is about $100. It isn’t the best quality of build or the best glass but it is an inexpensive option that you can still produce great images with. And it has a wider aperture of f/1.8 to work with. I decided to focus on the green grass ball thing on a shelf in my living room. I stood about 3 feet away from it while taking these pictures. I adjusted to my other settings so that the light coming in was pretty consistant otherwise we’d have black images by the end. I want you to see how changing the aperture changes the amount of the image in focus. And these are all straight out of camera. So I have not edited them.
Starting at f/1.8 and the focus on the grass ball. You’ll notice that not even the whole ball is in focus. The front is and it begins to blur before the end of the ball.

At f/2.2 the ball is more in focus, not entirely, but more. And the hand mold starts to become more in focus.

At f/4.0 the ball is more in focus, the hand and even the bottom of the frame starts to become sharper.

At f/5.6 it’s all beginning to look in focus.

At f/16 we see it all has definition in focus. The shelf isn’t very deep so even at f/22 it would look very similar to this.

Now to see them all together.

Next we’ll tackle ISO and then bring it all back together!
Looking for previous steps in the Learning Photography series?
Step 1 – Get to Know Your Camera
Step 2 – Modes & Exposure Triangle
Contact Jackie | Join the Facebook Fanpage | Check out the Website